Category Archives: Recipe

Sourdough Sally

Posted on

Hi folks.  Remember me?  I know, I know.  It has been a bit of time.  But, I’ve been here all along….. just apparently really “messy” over the holidays, as things keep falling off my plate….including this blog.  😦

Today, I’m sharing my pet with you.  Sourdough starter.  This pet (or rather these million pets, a combination of beneficial yeasts and bacteria, if you are feeling technical) is easy to keep.  You just have to remember to feed.  I call mine Sally and she lives in my refrigerator in a half-gallon blue Ball jar.

Here is Sally in all her yeasty glory.

Here is Sally in all her yeasty glory.

I have literally shared Sally by giving some of the starter to guests who had an intense interest in sourdough bread.  But since attempting to send the real thing to you via electronic signal might get a little messy …. especially for my computer … I hope you’ll be ok with sharing Sally via blog.

I’m somewhat of a sourdough snob in that I believe that sourdough bread should be comprised entirely of my own cultured yeast.  Most recipes you find these days call for part sourdough starter and part commercial yeast.

Soon, in this Bygone Basics blog, you will get a recipe for Sourdough bread.  I am giving you time to get your own pet in the refrigerator….ready to make bread.

Ever hear the old adage, “there’s more than one way to skin a cat”?  There is more than one way to start your own culture.  Some include potatoes, some take much longer…

Here’s a basic flour and water way:

  1. Make a paste with 1/2 c flour (unbleached/bread if you can) and 1/2 c water.  Loosely cover and leave at room temperature for 1 day.
  2. Stir in another 1/2 c flour and 1/c water.  Loosely cover and leave at room temperature.
  3. On the third day, it will smell a bit sour and be a bit bubbly.  Stir in another 1/2 c. flour and 1/2 c. water.  Loosely cover and leave at room temperature.
  4. On the fourth day….you may get the drill by now…. Stir in the 1/2 c. flour and 1/2 c. water.  Cover and leave at room temperature.  You should be seeing some clear evidence of the yeast “working”.
  5. On the fifth day, you should have a bubbly, fermented, pungent mass.  You have just given birth to your own Sally!  If it looks like it isn’t frothy and yeasty, leave it out another day…it could be your home wasn’t warm enough to encourage the growth in 5 days.   Once, I was making it for someone and it took about 9 days at room temperature to get a thick bubbly mass.

Another method…think “Easy Button” to borrow a phrase ….is this:

Mix 2 c. warm water (not over 115 degrees F) with a packet of active dry yeast.  Then stir in 1 1/2 c. flour.  Cover loosely and leave in a warm (not hot) place overnight.  It should be a frothy mass, but will not yet have the pungent, alcohol-ly, smell and depth of quality and flavor (some things are best taking the slow-road for).  At this point treat just as I describe above (as if it was the fifth day).  It is usable as sourdough starter and will develop the same depth of flavor and taste over time as it ferments in the refrigerator.  Don’t forget to feed her!

I just fed Sally.  I leave her out of the 'fridge for an hour to ensure feeding.  I feel better knowing my pet is alive and the little bubbles tell me she's doing just fine.

I just fed Sally. I leave her out of the ‘fridge for an hour to ensure feeding. I feel better knowing my pet is alive and the little bubbles tell me she’s doing just fine.

Regardless of how you start Sally, she will live indefinitely as long as you don’t starve her.  Her flavor will evolve based on the flours you use and even the wild yeasts that are present in your environment.  She will become, one of a kind, YOURS over time.

You can now make bread with her.  It is time to store her in the refrigerator.  She’ll live in there for 7 to 10 days.  Then, if you haven’t used some and refreshed her, you need to feed Sally.  Just take out a cup of the starter to make room for the “feed” and add in a 1/2 c. flour and 1/2 c. water (sound familiar?)  Every 2 or 3 feedings, I add a tablespoon of honey; and swap the white flour for whole wheat or…another flour every several feedings….but that’s just what I choose to do.

Do you make sourdough bread?  How do your techniques/recipe for starter differ?

Just don’t forget to feed her every week or so…

“I would say to housewives, be not daunted by one failure, nor by twenty. Resolve that you will have good bread, and never cease striving after this result till you have effected it. If persons without brains can accomplish this, why cannot you?” –’Housekeeping In Old Virginia’ Marion Cabell Tyree ed. (1878)

 Soon…..a nice recipe for bread using Sally and no commercial yeast.

To really add depth of learning and wonderful memories, you can come the our heritage kitchen here at Bygone Basics to learn heirloom  bread-making hands-on…and/or many other heritage home arts… http://www.bygonebasics.com.  You can even stay here at our immersion bed and breakfast!  www.amandasbequest.com

Better than Wedding Cake.

Posted on

Gather ingredients and tools. It is such a disappointing feeling to get part-way through a recipe only to discover you don’t have everything you need.

I think I may have a serious addiction. Pumpkins. They really do capture my attention as they are the source of the pure goodness known as: Pumpkin Pie.Welcome to the second part of the pumkin series.

I love pumpkin pie.  I could eat it morning, noon, and evening meals….and the occassional 1 a.m. kitchen raid.  In fact, when we married, I didn’t want a fluffy, fancy wedding cake.  I wanted pie.  🙂  The bridal cake was a pumkin pie, in case you wondered.

“Pumpkin pie, if rightly made, is a thing of beauty and a joy – while it lasts…..Pies that cut a little less firm than a pine board, and those that run round your plate are alike to be avoided. Two inches deep is better than the thin plasters one sometimes sees, that look for all he world like pumpkin flap-jacks. The expressive phrase, ‘too thin’, must have come from these lean parodies on pumpkin pie. With pastry light, tender, and not too rich, and a generous filling of smooth spiced sweetness – a little ‘trembly’ as to consistency, and delicately brown on top – a perfect pumpkin pie, eaten before the life has gone out of it, is one of the real additions made by American cookery to the good things of the world. For the first pumpkin pie of the season, flanked by a liberal cut of creamy cheeses, we prefer to sit down, as the French gourmand said about his turkey: ‘with just two of us; myself and the turkey.'” –‘The House Mother’

So this blog post is a follow-up to the last one.  If you remember, we baked pumpkins and saw how easy it is to get to the point of making a pie.  (I’m sure you rushed right out and cooked up pumpkins yourself!)

Pretty nice ingredients. Our free range hen eggs, milk from a local dairy, pumpkin from our garden…mmmmmmm

As I type this, I probably should have done a post on the pastry, but oh well, forward motion.

Pumpkin pie is pretty easy too.

Find your recipe.  I hope you’ll consider sharing your favorite one with me in the comments!  I use one that has become my favorite.  It requires simple ingredients….(no milk product from a can).  Now, gather your ingredients.

Two basic rules that will really help you enjoy your time in the kitchen is to prepare (premeasure, make sure you have everything) and clean as you go.

One pie pastry. Line the tin, forming the pastry to the pan. Flute the top.

Line your tin with the pie pastry.  In these photos, I’m making a smaller pie that will be gifted to a friend so it is in tin that she doesn’t have to get back to me.

Whisk all the dry ingredients together in a medium sized bowl.  This such a great recipe for requiring very few tools and bowls.

Now is time for the wet ingredients.  But first…Did you preheat that oven?  I frequently forget so thought you might like a reminder too.  A couple of comments on how I do things.  You might do them differently, but am sharing them anyway.  I bake my pies on a foil lined cookie sheet to catch drippings.  I also bake my pies in the lower part of the oven to direct the heat right onto the bottom pastry so it bakes before getting too soggy.

Add the wet ingredients.  With Pumpkin Pie, the usual suspects will be milk, pumpkin, eggs, extract.  But your recipe may differ.  It is really important to get the eggs thoroughly whisked into the filling.  If they are not incorporated well, you will have bits of egg white visible in your baked pie.

I whisk the eggs and pumkin in first. Taking care to get a good blend.

Place your pastry lined pie tin on the cookie sheet now if you are going that route.

Now, pour into the pastry lined tin and pop into the oven!  Be sure to double check your recipe for baking time.

I line my crust with foil to prevent overbrowning and to help support the pastry until it bakes some. It is so sad to discover your crust gave way and the filling poured out!

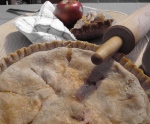
VOILA!

The recipe:

3/4 cup Brown Sugar             1/2 tsp Salt

1 TBSP Flour                            3/4 tsp Ginger

1 tsp Cinnamon                       1/2 tsp Nutmeg

1/2 tsp Cloves                          1 1/2 cups mashed cooked Pumpkin

3 Eggs                                       1 1/2 cups whole Milk

1 pie tin lined with pastry

Bake at 400 F for 50 minutes

WHAT IS YOUR FAVORITE PUMPKIN PIE RECIPE?  Does it have a family history?

NEATO!

Posted on

How neato is this?  kalamitykelli nominated me (icanatbygonebasics) for the Versatile Blog Award.  It sure added a thrill to my day as I was over focused and drenched in paint doing a project (hand-painting a sign for our B&B).

Thank you kalamitykelli.  🙂   (http://kellisretrokitchenarts.wordpress.com/)

As a VBA recipient, I should tell you 7 things about myself:

  1.  I have 8 children (6 daughters and 2 sons), 2 grandsons, 1 baby grand son due in August, and TWIN baby grandgirls expected next month!
  2. I can move my eyes independent of each other (makes me look rather loopy!)
  3. I just opened a heritage farm-stay Bed & Breakfast (www.amandasbequest.com)
  4. I garden every open square inch possible….vertical and horizontal (I have peppers and tomatoes stuck everywhere in the summer)

    This is what I've been doing. Hand painting a sign for our Bed & Breakfast. I covered in paint and am told by my husband that I must roll in paint like a horse in sand. http://www.amandasbequest.com

  5. I am a crazy chicken lady (love my free range “girls”) and they follow me about like ducklings
  6. I teach heritage culinary and farm kitchen skills (soap making, pressure canning, gardening, baking breads and pies old-style…etc) in a 140 year old kitchen (www.bygonebasics.com)
  7. I have a novel pacing across my brain and back, rattling its cage, wanting to get out….

Here are 15 versatile blogs I enjoy (no particular order):

1.  The Soulsby Farm (http://soulsbyfarm.wordpress.com/) who believe in the same lifestyle I do of self- sustainable living and are random bloggers so you get a wonderful view of their lives.

2.  Jen Maan in Amman (http://jenmaaninamman.com/) an ex-patriot from Southern California who is currently in Amman with her husband.  Her blogs are humourous and cultural diverse…and have some interesting recipes too!

3.  Kath Usitalo (http://kathusitalo.com/) has a couple of blogs and a great writing style…and she’s continuously visiting interesting places and sharing them in her blog with great photography too.  You never know what she’s going to share next.

4.  In Toads Garden (http://toads.wordpress.com/) is a wonderful gardener in Denmark with a very natural earthy style that I enjoy.

5.  Yes You Can (http://yes-you-can-can.com/) is a wonderful country girl’s guide and covers sewing, cooking, gardening…lots of basic “how to’s”

6.  thesolitarycook (http://thesolitarycook.wordpress.com/) is all about FOOD!  She knows her stuff and clearly loves the enormous variety of foods she writes about.

7.  wallopingteaspoon (http://wallopingteaspoon.wordpress.com/) is also culinary pro in my book.  Her blogs are thorough and well written.  She blogs about food from tuxedo cupcakes to a good “sammich” to Red Snapper

8.  Rosey Dow Blog (http://roseydow.wordpress.com/) I like her old house blogs and feel an affinity.

9.  hippie itch (http://hippieitch.wordpress.com/) covers a lot of topics from healthy lifestyles to food to animals.  I love her passion for animals.

10.  The Domestically Impaired Guide to Retro Kitchen Arts (http://kellisretrokitchenarts.wordpress.com/) is a great blog on home canning…a KINDRED SPIRIT.

11.  Aquaponic Family (http://aquaponicfamily.wordpress.com/) is a fun blog about aquaponic gardening.  I live vicariously through them as I would like to do what they are….

12.  Farm Country Crafts (http://farmcountrycrafts.wordpress.com/) Pretty well described in the title but goes much further!  A fun blog and you’ll love her Five Reasons to Do Yard Work in the Shade.

13.  domesticateddilettante (http://domesticateddilettante.wordpress.com/ is a well-written and well-rounded blog about family, food, gardening… I love that she is determined to garden.

14.  The Cosy Creative (http://thecosycreative.wordpress.com/) is about a lot of things.  I really like her motto “feel happy, make something”

15.  Linda Stone (http://lindastone.net/) is a thinker and able to transmit those thoughts with good clear writing.  What can I say, I like thinkers!

Keep up the great posts!  And thank you for sharing parts of your lives with me.

Valerie Hanson

Cheery Query

Cheery Query

I have a question to pose readers this week.

I make  a living (or rather am working hard at building a living) from my recipes both food and home art.  Creation of good to eat victuals and healthy home products from heritage and/or natural ingredients are a passion for me.  It is so thrilling when someone asks for a recipe or how to make a specific soap.  What is the saying?

Imitation is the sincerest form of flattery.” (FYI:  Charles Caleb Colton originated this in early 1800’s)

Some of my kitchen tools.

But truthfully, it is conflicting.  When it is a recipe printed in a cookbook I have, originated in recent times, it seems right to share it.  The requester could likely look it up (on the ‘net usually) and by sharing, I enjoy helping that person.   Is it right to share out of a cookbook?  Is it a disservice to the author of the cookbook?

Here’s were it gets personal.  When it is a recipe I have invested a lot of time and resources (failed attempts, come to mind 😉 …my apologies to husband John who has to eat the …umm…less than stellar results).  It is a unique recipe  and customers are willing to purchase the product I have developed, how should I respond?  Is it constructive or detrimental?

After all, I love to be helpful and see the many wonderful people in my days happy.

So I query you.  Out of curiosity.  Out of a desire to learn and grow.

What is the appropriate response?  Many of you are incredible chefs and cookbook authors.  I’m just … me.

Your comments are most welcome!!

Therapy Cookies and Suzanne’s Lesson

Therapy Cookies and Suzanne’s Lesson

Back from yet another long trip to Kansas.  This time for the funeral.  A 43 year old vibrant wife and mother of five passed on Valentine’s day.  I really do want to shake my fist and rail at the universe for its injustice to good people.  But, while was mentally considering how to do that without getting struck by lightening or something, I baked cookies. (It’s how I wrap my head around things, I bake)
As it turned out, there was therapy in those cookies as well as the realization that I had just been taught a huge life lesson by my sister, Suzanne.
Abraham Maslow said that we could define therapy as a search for value.
I suppose that defines my thoughts this morning.  I set to work doing my Bygone Basics’ bakery orders (www.bygonebasics.com) with the very recent death of my brother’s wife, Mary, weighing heavy.  Seeking reasons or value to this tragedy.

Toasting the walnuts, tossed with cinamon sugar.

I began by making my special recipe for chocolate cookies.  The first thing was to create small walnut pieces out of whole walnuts.  I will admit to excessive force.  The walnuts were cracked with some malice.  Then I put the walnuts in a heavy plastic bag and whammed the heck out of them with a french rolling pin. …Beginning to feel a bit better.  🙂
Next, everything needed to be measured out.  The flour, rolled oats, chocolate chips, butter, eggs, spices….By the time I was finished, the concentration on accurate measurement had actually taken my mind to a better place.  Of course tasting fresh cookie dough helps too.

By the time the cookies were going on the cookie sheets and being baked, I was thinking more deeply about the recent events.  My brother had chosen an unusal passage for his wife’s funeral service.  It began “Rejoice Always.  …In all circumstances, give thanks,…” (Thes 5:16-24).  He had explained that when he was at his lowest point, when it was obvious Mary was slipping away, he heard this passage at Church.  It angered him at first, and then, it served to bring him out of a very angry and dark place.  It caused him to look around and find that there was still good in his life.  His children especially.  His family was brought close by this.What did I have to rejoice in?

What gift has Mary’s passing given me?

The example set by my sister, Suzanne.  Not too long ago, she lost her own husband to cancer at 41 with a young son at home.  It was a long and hard path to (and from) his passing.  She endured a lot that I can’t even imagine.  Yet, there she was, the first one to understand that our brother was alone several states away and needed help.  Placing her job in jeapardy, she made two extended trips to help him.  I was blessed to go with her.  Even though it caused her to relive her own deep pain, she cared for our sister-in-law with such depth and consideration.  She talked with our brother on a level that only those two could understand.  She cried at night and was a pillar in the day.  She made sure our young nieces had what they needed.

I loved my sister before.  But now, I rejoice in the heart and soul of such an amazing woman.  Her selfless example of care will live on in me and in my priorities in life.

Add the oats, toasted walnuts and chocolate chips

Such was Suzanne’s lesson for me.

I feel better.  The cookies are baked.  I’ve had a bit of an epiphany.  I even went on to get my french baquette order done and restarted the Sourdough starter.

…..Heck, I might even feel like doing my blog.  Hope I don’t get to philisophical…..  😉

By the way…Did I ever tell you that I have started to “Tweet”?  Find me at @ApronsRUs.  (Yes, it is an odd twitter name, sometimes, I just can’t help myself…my humor is a bit …quirky.)

This slideshow requires JavaScript.

…wearing a fetching apron,

Posted on

“And now have a look at you! You’re so pretty … wearing a fetching apron, of course, and your hair’s neat and beautiful, held back by a ribbon”

The title of this post comes from a line (the rest of it is above) in one of my favorite interests…older cook books.

Aprons are fun and VERY handy. I am not sure why they fell out of use. This is one of mine.

This one in particular is special.  It was my first foray into old cookbook land.  I bought this First edition 1955 “Better Homes and Gardens Junior Cook Book for the Hostess & Host of tomorrow” about 15 years ago at a yard sale.  My daughter Jessica was getting interested in the kitchen and I wanted to encourage it.  At the time she really didn’t see the charm in the old book, like I did.

She was 10 and the cookbook was “soooo….yesterday.”  🙂

If you can get past the chuckles you’ll have at the quaint language and gender assumptions, older cook books are fabulous peeks into our history.  They are windows into how family life was conducted in homes during period in which the cook book was printed. By reading them, we are peeping-toms of a sort.  Through the ingredients, we learn what were common staples in the pantry.  In the description of tools to use, we know how much time was spent in the kitchen, or how tricky cooking over a wood burner or early gas or electric range may have been.  Even the portion sizes change over the eras.

One of our fun cookbooks.

I love my old cook books.   I have a lot of them, including one from the White House circa 1901, filled with hand written notes and old news clippings. (and yes, I do wear an apron. We have many of them so our guests can put one on too when they are experiencing our heritage kitchen.)  What makes me sad is that the recipes don’t please the average U.S citizen’s palate today.  The cook books of today use far more sugar and shortenings in recipes.  The scone of today certainly isn’t the scone of a 100 years ago.  I wonder why we have an obesity epidemic in the U.S…?

Now…a recipe from the BH&G Junior cook book:  “Everyday drumsticks”

1 lb. gr beef

1 tsp salt

1 egg

12 soda crackers

6 wooden skewers

3 slices bacon

The Drumstick recipe. Easy for a child...and adult.

Set oven to 450.  Put beef, salt and egg in a bowl.  Mix.  Divide into 6 parts.

Put crackers in a bag.  Roll with a rolling-pin to form crumbs.  Put crumbs on waxed paper.

Shape the balls of meat around skewers to look like drumsticks.  Roll in crumbs; place on greased baking pan.  Bake 15 minutes.

Cut bacon slices into 4 pieces.  Put on meat.  Bake 15 minutes more.

This recipe is what a little girl of 9 – 12 in age could be expected to do in 1955.

If you have older cookbooks that are at least 40 years old, have a look at them with an eye toward looking at the home and family life.  It is a unique way to look at cook books and may just inspire you to make a dish you’ve never tried before.  Share your own cookbook discoveries and new old recipe attempts in the comments area below or by emailing ICan@bygonebasics.com.

A side note of news for you….I’ve completely redesigned our Bygone Basics website.  Please, have a look at it and tell me what you think.  It is easier to navigate, cleaner, and uses photos to show people what an experience is like here at Bygone Basics.

Check it out:  www.bygonebasics.com

Parting quote from the old cookbook:

You’re about to turn the page to a heap of fun. So…hands washed? Have on a pretty apron, and is your hair looking mighty smooth?  O.K., Kitchen, here we come.

And a parting photo…how fun!:

Boys and girls can have fun in the kitchen...even in 1955. Though, it would seem from the photo that boys do take a bit of a back seat ...

Enlightenment on Leavening

Posted on

There’s not much that can hold a candle to enlightenment. Sorry. Couldn’t help that pun.  January in Michigan causes us to get a bit loopy in the short cold days and lack of sun.  🙂

As a “Kitchenaire” at Bygone Basics (www.bygonebasics.com) I help a lot of people experience kitchens in the way they developed as the heart (and the stomach) of the homes of our establishing country.  We do a lot of exploring of old customs and current ones…and the how and why of them.  It is a great way to learn our history and culinary heritage.

One question I get a lot is “What is the diference between baking soda and baking powder?”

It is honestly a fabulous question.  And certainly due a good answer.  The short answer is…Baking powder is baking soda-plus.  In other words.  Baking powder has baking soda plus other agents that help it leaven in blends that only baking soda doesn’t do as well in.

Some recipes call for multiple leavening ingredients. Crumpets, for example call for yeast to raise the dough like a bread and then a baking soda and warm water solution is added right before cooking.

A bit longer explaination is that baking soda alone does well as a leavener in mixtures that include an acidic ingredient.  This could be buttermilk (lactic acid), vinegar, sour cream, molasses, lemon juice and honey (yep honey).  BUT….when the recipe requires leavening and there are little to no acidic ingredients, baking powder is your secret weapon.  Baking powder is a mixture of baking soda and added acidic ingredients, such as cream of tartar, to help with leavening.  Baking powder cannot be used as a single substitution in recipes that call for baking soda.  Your recipe will fall flat. (sorry, another pun, I guess, I’m a bit “light” headed)  As a rule of thumb, baking soda is used in cookie recipes and baking powder is used in more neutral recipes ( that contain flour, sugar, milk, oil, salt) like cakes and biscuits.

Yeast is the biological leavener for Bygone Basics' artisan stone baked bread.

A note on leavening…because I can’t help myself.  I looked it up in Wikipedia to see if I could share the knowledge in an easy to understand way.  According to that source, there are multiple types of leaveners in food stuffs (http://en.wikipedia.org/wiki/Leavening_agent).

Biological:  Anyone who uses yeast in breads, or makes beer or wine is going to understand the use of microbes and their resulting gas release as part of their life cycle.

Chemical:  These are used in everyday modern baking.  Baking soda, powders.  Used to release carbon dioxide (usually that is the gas) when heat is applied.

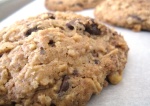
Bygone Basics' hierloom recipe for Chocolate Chip cookies calls for a lot of oats, nuts, chocolate...and baking soda.

Valerie’s note:  In the case of baking soda, it begins acting immediately, before heat, (resulting in recipes falling flat if there is a delay in baking)….FYI….this is also where baking powder helps…delayed actions…aka double acting baking powders have an ingredient that waits for the heat of the oven.

Mechanical:  Think….meringue.  Mechanical leavening is the introduction of trapped air into the ingredients through whipping or whisking.

Steam/air/gas injection:  Water is flash expanded into steam in the case of pop-overs.  Nitrous oxide is used to “leaven” aerosol “whipped” cream.

There is a leavening agent that isn’t mentioned much anywhere these days.  Ammonium Carbonate.  It was the predecessor of modern leavening chemicals.

It was mainly used in heirloom recipes of northern Europe and Scandinavia.  I have learned that you cannot substitute baking powder or baking soda in these old recipes and get the same light airy results provided by Ammonium Carbonate.   One of my husbands favorite childhood memories involves a recipe called Princess Gems.  It’s leavening agent is Ammonium Carbonate (aka Baker’s Ammonia or Salt of Hartshorn).  I was determined to give him that memory this last Christmas.  It took some doing, but I managed to secure some of the historical leavener.  Right in the old recipe card are the instructions not to breathe in the fumes from the leavener.  (It doesn’t mention not to breathe when you open the oven door when baking them, but that’s another story)  The ammonia bakes off in the oven and leaves an incredibly light and melt-in-your-mouth airy cookie.

Does anyone else have an old recipe that called for Ammonium Carbonate?  Please, share it with me!!!  I am truly fascinated by old recipes and ingredients.

Well…until next time.  I’m delighted that you read this blog.

Parsnip Pleasures

Posted on

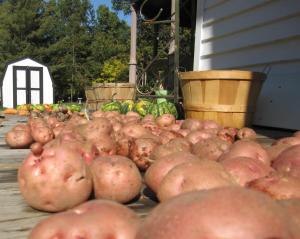
Late summer harvest

Potatoes, squash, and other hunks of garden goodness.

I should note right up front in this blog that I LOVE winter storage crops and the food that comes from it. Many people say they don’t and then indicate that they prefer the tomatoes and strawberries of summer. ( To be honest…I like it all!)
I’ve noticed that many people haven’t really spent much time “meeting” winter crops. By winter crops, I mean those yummy hunks of goodness that are harvested late in the year and store well over winter. 

Some examples here in western Michigan are:

  • Potatoes
  • Carrots
  • Parsnips
  • Rutabaga
  • Squash
  • Ida Red apples
  • Chestnuts
  • Sweet potatoes

Parsnips make potato dishes much more flavorful and interesting. Try some cabbage and chestnuts in your next stew.

If you are lucky enough to still have a farmers market open near you…pay it a visit.  You’ll be rewarded with extra nutrition, “stay-with-you” hearty food, and a dimensional flavor that many summer crops don’t give.

Here is one of my favorite winter recipes.  It is easy and tasty:

3, 2, 1 Potatoes!

  • 3 large baking potatoes, peeled (or not, lots of good nutrition in that peel, wash well though)
  • 2 medium Parsnips, peeled (Rutabaga works too)

Chunk them up into 1 1/2 chunks or so and toss them in a pot of hot water.  Turn the heat on and bring to a boil.  After 10 minutes of boiling, add:

  • 1 large clove of garlic.  (just peel and toss in)

Boil for another 15 minutes.  Drain. If you used a colander to drain (I just use the lid of the pan to keep everything still in the pot and drain over a colander to catch the run-aways and put them back in).  While the pan is still hot, add:

  • 1/4 cup of cream (milk will do in a pinch, just up the butter a bit)
  • 2 TBSP butter
  • 1/2 tsp salt
  • 2 dashes of black pepper.

Mash the potatoes.  I use my hand-held electric mixer to mash faster to keep every thing hot and result in a fluffy dish.  Ta-Da! 

A mix of just about any winter crop using the same 1 strong flavor (onions, garlic…), 2 medium flavor (rutabaga, parnsip, carrots), and 3 mild flavor (pretty much potatoes but I have used cabbage and chestnuts here and it went well) results in a great winter dish.  Flavors will vary of course…YAY for variety!!

I’d love to hear about your winter favorite winter crop recipe.  Email me at ICan@bygonebasics.com.

Of course visit the www.bygonebasics.com website and our Facebook page.